
Please ensure that you have completed the setup for Syncro before continuing. If you have not completed the setup, please follow the steps here.

Connecting Syncro to Billing Sync
- In Billing Sync under
Configurations, click on Connections
- Find
Syncro under Targets
-
If the Connection is not enabled yet, you will see a button to
- Clicking this will allow you to make an email request to enable Syncro as the sync target
-
Once enabled, you will then be able to click on
- Enter the API Token details from Syncro
- Once done, click on
- Confirm the Connection status for Syncro is
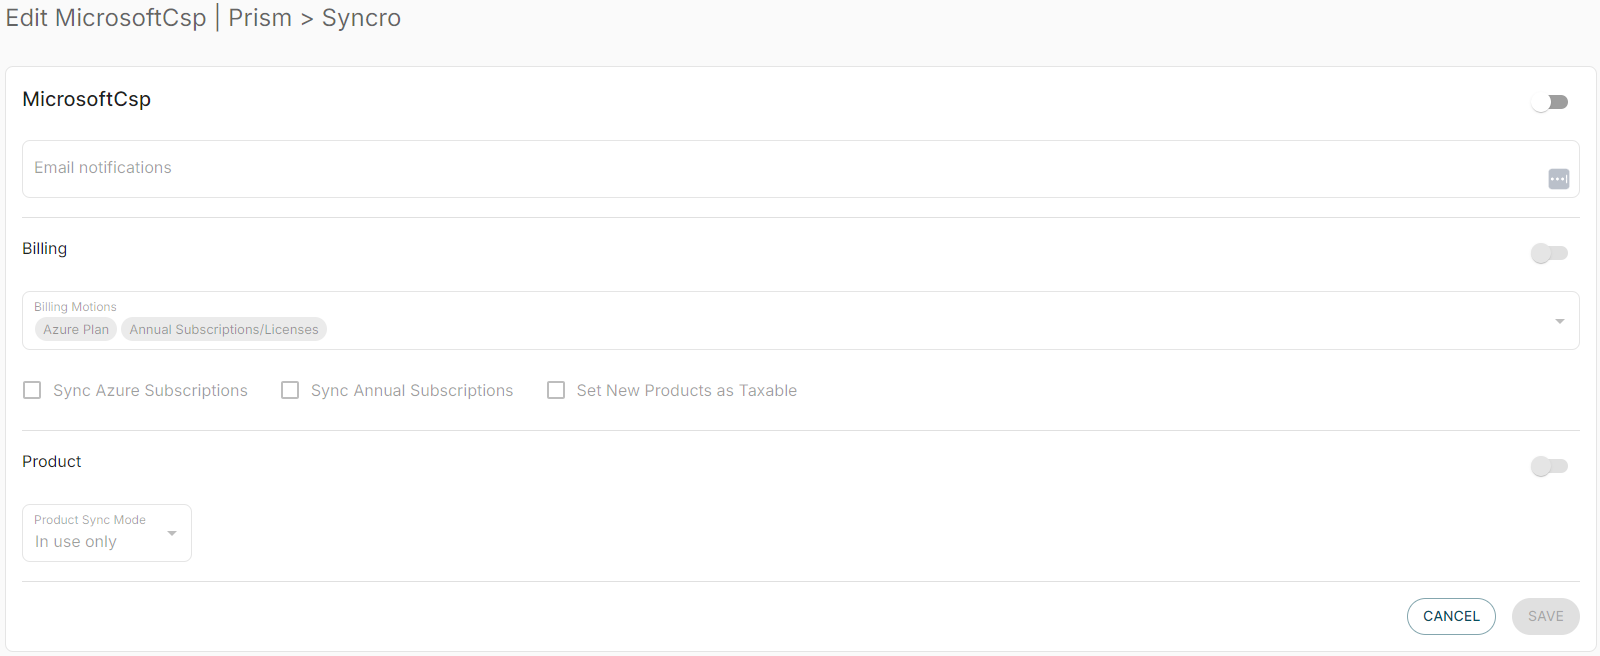
Configure Program Sync Options - Microsoft CSP
You will need to configure which programs to sync to Syncro. At this stage, only Microsoft CSP is available, but other programs may become available in the future.
-
In Billing Sync under
Programs
- Click on
Edit button along Microsoft CSP program for Syncro
- In Program Edit screen:-
-
- Toggle the Microsoft CSP
button to
to enable
- Enter your group notifications email address
- Toggle the Billing
- For Billing Motion, click on
to view and select available billing motions:-
- Toggle the Product
- Under Product Sync Mode select either All Products or In-Use Only
- All Products - all products from the PRISM Program will be synced to Syncro as Software Items.
- In-Use Products only - Only products found in your Invoices for the mapped Customers will be added.
- Tick the
for Sync Azure and Sync Annual Subscriptions. This can be turned off later
- Tick the
- Toggle the Microsoft CSP
Once completed, click on
Once you have configured a program to Sync, the program will show as a menu item, allowing you to quickly navigate and configure the program sync.
Product Sync
Billing Sync will create a product in Syncro for each product in PRISM Connect unless the sync mode is In Use Products Only, in which case a subset will be synced based on usage.
The product names will contain the product SKU and can be renamed after the first sync. The services added by Billing Sync can be identified by the prefix “PC_” followed by the product SKU. Billing Sync will continue to update the service based on the service ID. Only the product unit price and unit cost will be updated after the first sync.
If a product is deleted in Syncro, Billing Sync will create an equivalent product on the next sync. If a product no longer exists in Billing Sync, sync will NOT remove the service from Syncro.
New products added by Billing Sync are active. If a product that is synced by Billing Sync is set as inactive, Billing Sync will continue to sync that product, but the product will remain inactive.
Configuring Customers
Billing Sync works by syncing invoices from a Cloud-IQ/PRISM Customer/Tenant to a Contract for a Syncro account. You must have the Syncro accounts and Invoice Schedule set up prior to this step.
- Under the newly available
menu item in the navigation pane (left column), click on
Billing
- Search for the customer you wish to map in the
. field
- This will show results for the customer and the different Billing Motion
- Once you have located the customer, click on
to begin mapping
- Clicking edit will open a window to map to the existing Syncro Customer/Agreement.
-
Select Syncro Customer and Invoice Template from the drop-down
-
Once completed, click on
-
Select Syncro Customer and Invoice Template from the drop-down
Comments
0 comments
Please sign in to leave a comment.